Editor's choice

Save 20% Off On Food Storage

susbscribe.jpg

Subscribe and Save Food Storage

As a parent I want to be able to provide for my family no matter what happens.  Having a longterm food storage plan is a great place to start, but the task can appear overwhelming and expensive.  Don't let the financing or the planning get in the way of building your food storageLegacy Food Storage has started a Subscribe & Save program so you can save 20% on all of your purchases.  It's simple and allows you to space out your purchases to fit your budget.  Hand select the items you want to add to your storage, select your ordering schedule and you are all set!Watch this video to learn more about the Subscribe and Save program: 

Things To Remember

There is no wrong or right way to build up your families food storage.  The important thing is to start and to start today.  This is not your only option it's just a fantastic way to do it and save a few bucks in the process.  It is important to build up your everyday pantry with canned and shelf stable goods but it is also important to build up a long term solution to obtaining food safety.    That's the real reason to start this process with Legacy Food Storage's Subscribe and save program.  Here are a few things to remember about their products:

  1.  25 Year shelf life
  2. all ingredients are Non-Gmo
  3. Lowest cost per pound in the industry while offering the largest portion size
  4. Gluten free options
  5. Made in the USA
  6. They have options that are kid friendly
  7.  Legacy offers many specialty items such as longterm peanut butter, fruits, veggies, and meats for you to add to your storage
  8. The meals are good enough for quick meals on the go

Subscribe & Save Today

72 Hour Vehicle Kit Prep List

carkit1.jpg

 72 Hour Vehicle Kit Prep List

A 72 hour vehicle kit is a great addition to your preps as it travels with you wherever you drive.  This prep list lays out for you the basic survival gear, car tools, and food you need to stay alive over three days.  This will come in handy if you get stuck in a storm, break down on a road trip, or even for something as simple as a navigating basic car trouble.The question you need to ask yourself is: "If a storm hit today while away from your home would you have everything you need in your vehicle to survive for a few days? "  If you were suddenly asked to evacuate the area would you have the basic supplies to take with you?  Some may argue that they always have their EDC bag or their Get Home bag  on them so why is there a need for a 72 hour vehicle kit?  Isn't it just a little overkill?  The answer is no, it's not if you really think about it, here are a few reasons why this gear redundancy is called for:

  1.  What if you are separated from your get home bag? Maybe you left it in the office, maybe the building has been evacuated before you could grab your bag?
  2. What if you have to pick up a friend or spouse or take a fellow employee with you?  (The extra gear may come in handy)
  3. What if your stranded for more than 3 days?
  4. The old saying still rings true: "One is none and two is one"...besides training redundancy is great way to increase your odds of survival!

Here's my basic 72 hour vehicle prep list highlighting everything that I have in my car at all times.

72 hour kit Prep List for your vehicle:

Bonus Gear Prep List

  • Ham Radio
  • Cb Radio
  • Sunglasses
  • Fire Arm with ammo- ** Please follow all laws in your area. Always keep firearm on your person or                                              locked away properly!
  • Pair of Hiking Boots
  • Baby wipes for hygiene or Bath wipes- (Pack of 5 put a few in your other bags)
  • Plastic zip lock bags
  • zip ties 

Final Thoughts

Having a solid 72 hour vehicle kit is a great way to help you feel more prepared for disasters or the unknown.  If packed properly, a 72 hour kit will give you everything you need to keep you alive for 3 days.   Having one of these for your car can be useful in the case of an emergency evacuation or if your car simply breaks down in a remote location.Adding a few items to the trunk for one of these unforeseen disasters or events will not only help you prepare, but also keep you safe and focused on finding a solution when you actually  find yourself in one of these situations.

What's in your kit?

Let me know in the comments below! 

#sharetoprepare

Nuclear Prep List

bomb-e1504892193757.jpeg

Nuclear Prep List

General Emergency Supplies:

Every prep list has multiple layers, all of which can be highly personalized. For my Nuclear Prep List this section covers the top 45 essentials for your supplies. After covering these items I will breakdown a few other areas for you to consider in your prepping for a nuclear disaster. I will cover suggestions for basic tools, medical preps, and even give you a few planning tips!

  1. 30 day supply of food

    1. 30 day supply of water

    2. Off Grid Heat Source or a small Heat source

    3. Hazmat Suit

    4. Extra pair of clothes

    5. Lights- Think grid down black outs

    6. Sanitation kit

    7. Radiation detector

    8. Recreational material- Cards, board games, etc.

    9. Decontamination Supplies–soap, water and moist towelettes will do in a pinch. There are also products made especially for radioactive decontamination, but they're primarily sold to first responders and not easy to find for sale to consumers.

    10. Potassium Iodide tablets– Protects against deadly thyroid cancer from exposure to iodine-131 - commonly found in radioactive fallout. You can buy this over-the-counter and keep it on-hand - it has a shelf life of about 5 years. Choose an FDA approved brand, like IoSAT or ThyroShi

    11. Radiation filter or straw: This device filters radioactive particles like: Radon 222, Radium, Plutonium, Uranium, Strontium, Cesium 137, and Radioactive Iodine, out of water. Look for devices approved by the NELAC (National Environmental Laboratory Accreditation Conference.)

    12. Plastic bags

    13. Disposable vinyl gloves

    14. N95 Masks

    15. Gas Masks

    16. Tarps

    17. All weather radio

    18. Ham Radio

    19. Power Banks- Anker or Goal Zero

    20. Duct Tape

    21. Gorilla tape

    22. Light Sticks

    23. 5-Gallon Buckets

    24. Portable Toilet (optional)

    25. Sturdy shoes or work boots

    26. Rain gear

    27. Sunglasses

    28. Thermal underwear

    29. Work Gloves

    30. Flashlight

    31. Batteries

    32. Plastic bags for waste (if there is no toilet in the shelter space)

    33. Cell phone,

    34. Cell Phone charger & adapters

    35. Family emergency contact information

    36. Cash small bills- people won't be makeing any change for you after SHTF

    37. Emergency blanket

    38. Extra sets of keys (house, car)

    39. Whistle - helps first responders locate you

    40. Matches

    41. Towels

    42. Scissors

    43. Liquid household bleach

    44. Wool Blankets or sleeping bags

    45. Back Up Water Storage: You can never have enough water!!

Tools

This list could be a lot larger and I am sure someone is cursing my name for forgetting some really obvious choices. Tools like survival gear is a personal choice and largely based around your plan. If you have more space to store more tools by all means be my guest. But if you are just looking for the bare essentials this is your list

  1. SOG Multi tool

    1. Gas shut off

    2. Can opener

    3. Crow bar

    4. Lighter

    5. Water Filter

    6. Cooking stove

    7. Cook Set

General Medical Supplies

Medical tools are great to have but they are even better when you know how to use them. You might not be able to become a surgeon but you can easily learn the basics by taking first aid classes and reading a few books before the SHFT happens. If you are preparing in a group I highly suggest adding a friend or two that has medical training to your survival group.

  1. Prescription Medications- at least a 7day supply.

    1. First Aid Kit or Stomp Kit

    2. Denture Needs

    3. Extra contacts and glasses

    4. Medical Information- List of medications, medical information, physician's names/phone #'s.

    5. Glasses, contact lenses,

    6. Mobility devices,

    7. Hearing aids & batteries)

    8. Iodine Solution (tincture of iodine or Betadine)

Planning

“Failing to prepare is planning to fail”- Benjamin FranklinCreate a plan and then a back up plan for your first plan.   Nothing ever goes just the way you envision it in life and even more so in a survival situation. Planning and practice runs can be the difference between living or dying…it’s that simple!

  1. Maps and Directions- keep in mind you may not have access to the Internet or GPS satellites.

    1. Evacuation plans- do you have friends or family out of the area that you could stay with in a crisis? Have their information, phone numbers, directions available. Make sure to have multiple routes planned to get to your desired location.

    2. Plans for your pets– For the big time animal lover, you may want create a plan for your pets. If you have the time and if you can't bring them with you, you may want to create a list of places where you could board them. Phone numbers and directions would be a good idea.

Personal Documentation

Being able to prove who you are and what you own is important after disaster strikes. I am sure that some folks preparing for nuclear war may feel that the world will never bounce back and possessions will become meaningless. All though this may be true depending on your disaster scenario, if the world does fix it’s self I would love to have the needed documentation to help pick up the pieces. For this reason, I keep hard copies in a secure location and digital copies of these documents on a tough Survivor USB stick. This guy is small and as tough as nails but holds a ton of data. Here’s what you need to store:

  1. Personal Papers (Can be made part of the Family Disaster Plan)

    1. Wills, insurance policies, contracts, deeds, stocks, and bonds

    2. Passports, Social Security Cards, Immunization Records

    3. Bank account numbers

    4. Credit card account numbers and company contacts

    5. Family records (birth, marriage, death certificates)

    6. Local emergency coordinators and first-responder info

    7. Print out information you may need

General Tips From The Editor

  1. Inventory of valuable household goods- you can’t use it if you don’t know you have it!

    1. Every family is unique. You may have emergency needs not included in this list. Figure out those special needs and plan for them now.

    2. Remember to update your kit according to changing needs of your family and seasons.

    3. Be sure it’s ready to use and accessible! In a disaster situation, you may need to get your emergency supply kit quickly, whether you are sheltering at home or evacuating.

    4. Once you have gathered your supplies, pack the items in easy-to-carry containers.

    5. Clearly label the containers and store them where you and other members of your family can reach them easily.

    6. Make sure you show your family where your preps are located and how to use them. You are only as strong as your weakest link!

    7. Know Your House: Find out where your gas, electric, and water shut-off locations are, and how to turn them off.

    8. Remember that certain items, like medications and paper documents, need to be kept in waterproof containers or in controlled environments free of major temperature changes.

    9. You may need additional supplies to make sure the whole family is ready. Remember not everyone prepares!

    10. Keep everything in a covered storage container. Store papers, medications, matches, batteries, phones, radios, flashlights,(and anything else subject to water damage) in waterproof containers.

    11. Check the expiration dates on food, water, medicine, and batteries at least two times per year. It’s extremely important that all items in your kit are functional at the time of an emergency.

Nuclear Attacks According To Ready.gov

In general, potential targets include

  • Strategic missile sites and military bases.

  • Centers of government such as Washington, DC, and state capitals.

  • Important transportation and communication centers.

  • Manufacturing, industrial, technology, and financial centers.

  • Petroleum refineries, electrical power plants, and chemical plants.

  • Major ports and airfields.

The three factors for protecting oneself from radiation and fallout are distance, shielding and time.

  • Distance - the more distance between you and the fallout particles, the better. An underground area such as a home or office building basement offers more protection than the first floor of a building. Shielding - the heavier and denser the materials - thick walls, concrete, bricks, books and earth - between you and the fallout particles, the better.

  • Time - fallout radiation loses its intensity fairly rapidly. In time, you will be able to leave the fallout shelter. Radioactive fallout poses the greatest threat to people during the first two weeks, by which time it has declined to about 1 percent of its initial radiation level.

Taking shelter during a nuclear blast is absolutely necessary. There are two kinds of shelters:

  • Blast shelters are specifically constructed to offer some protection against blast pressure, initial radiation, heat and fire. But even a blast shelter cannot withstand a direct hit from a nuclear explosion.

  • Fallout shelters do not need to be specially constructed for protecting against fallout. They can be any protected space, provided that the walls and roof are thick and dense enough to absorb the radiation given off by fallout particles.

Remember that any protection, however temporary, is better than none at all, and the more shielding, distance and time you can take advantage of, the better.

Before a Nuclear Blast

The following are things you can do to protect yourself, your family and your property in the event of a nuclear blast.

  • Build an Emergency Supply Kit

  • Make a Family Emergency Plan.

  • Find out from officials if any public buildings in your community have been designated as fallout shelters.

  • If your community has no designated fallout shelters, make a list of potential shelters near your home, workplace and school, such as basements, subways, tunnels, or the windowless center area of middle floors in a high-rise building.

  • During periods of heightened threat increase your disaster supplies to be adequate for up to two weeks.

During a Nuclear Blast

The following are guidelines for what to do in the event of a nuclear explosion.

  • Listen for official information and follow the instructions provided by emergency response personnel.

  • If an attack warning is issued, take cover as quickly as you can, below ground if possible, and stay there until instructed to do otherwise.

  • Find the nearest building, preferably built of brick or concrete, and go inside to avoid any radioactive material outside.

  • If better shelter, such as a multi-story building or basement can be reached within a few minutes, go there immediately.

  • Go as far below ground as possible or in the center of a tall building.

  • During the time with the highest radiation levels it is safest to stay inside, sheltered away from the radioactive material outside.

  • Radiation levels are extremely dangerous after a nuclear detonation but the levels reduce rapidly.

  • Expect to stay inside for at least 24 hours unless told otherwise by authorities.

  • When evacuating is in your best interest, you will be instructed to do so. All available methods of communication will be used to provide news and / or instructions.

If you are caught outside and unable to get inside immediately:

  • Do not look at the flash or fireball - it can blind you.

  • Take cover behind anything that might offer protection.

  • Lie flat on the ground and cover your head. If the explosion is some distance away, it could take 30 seconds or more for the blast wave to hit.

  • Take shelter as soon as you can, even if you are many miles from ground zero where the attack occurred - radioactive fallout can be carried by the winds for hundreds of miles.

  • If you were outside during or after the blast, get clean as soon as possible, to remove radioactive material that may have settled on your body.

  • Remove your clothing to keep radioactive material from spreading. Removing the outer layer of clothing can remove up to 90% of radioactive material.

  • If practical, place your contaminated clothing in a plastic bag and seal or tie the bag. Place the bag as far away as possible from humans and animals so that the radiation it gives off does not affect others.

  • When possible, take a shower with lots of soap and water to help remove radioactive contamination. Do not scrub or scratch the skin.

  • Wash your hair with shampoo or soap and water. Do not use conditioner in your hair because it will bind radioactive material to your hair, keeping it from rinsing out easily.

  • Gently blow your nose and wipe your eyelids and eyelashes with a clean wet cloth. Gently wipe your ears.

  • If you cannot shower, use a wipe or clean wet cloth to wipe your skin that was not covered by clothing.

After a Nuclear Blast

People in most of the areas that would be affected could be allowed to come out of shelter within a few days and, if necessary, evacuate to unaffected areas. The heaviest fallout would be limited to the area at or downwind from the explosion. It might be necessary for those in the areas with highest radiation levels to shelter for up to a month.

Returning to Your Home

Remember the following when returning home:

  • Keep listening to the radio and television for news about what to do, where to go and places to avoid.

  • Stay away from damaged areas. Stay away from areas marked “radiation hazard” or “HAZMAT.”


What would you add to this prep list? Comment below...

Survival Theory Review

bookreview-e1504372446563.jpeg

Survival Theory Review

Survival TheoryJonathan Hollerman’s, Survival Theory is a well-laid-out and pragmatic approach to the ideas and theory behind surviving the end of the world. Yes, this topic often sounds very dramatic, but this book is far more practical than its genre leads on.Hollerman takes you through the common reasons for prepping, laying them out in easy-to-understand ways and providing evidence to support these theories—all while underscoring his primary theory that we should all be preparing for an upcoming grid-down scenario.  He believes that our frail power gird is vulnerable to an EMP (Electro-Magnetic Pulse), solar flares, cyber attacks, and to physical terrorist attacks.  If you think the idea of an EMP or a cyber attack is far-fetched, I urge you to read this book immediately.  His evidence is staggering and all based on findings from interviews and published articles written by top government officials (not some experimental scientists with questionable funding!).EMP believer or not, Survival Theory is the perfect book for both those beginning to prepare and die-hard preppers. (Even veterans sometime need a wake-up call to shake them out of their “preparedness tunnel vision” by challenging their research and preps.) Hollerman challenges your ideas on whether or not you should bug out, your gear, and even your method for calculating your food storage. In a straightforward, non–combative way, he shakes everything up with systematic research, consistent reinforcement of ideas, and his expertise in his field.Where did this expertise come from? Before becoming an author and consultant, Hollerman was trained by the U.S. military as an SERE instructor. This training would become the foundation of his survival skills and tactical opinions. For those that do not know what an SERE instructor teaches or what SERE is, here’s the definition given by Wikipedia:

“Survival, Evasion, Resistance, and Escape (SERE) is a program, best known by its military acronym, that provides U.S. military personnel, U.S. Department of Defense civilians, and private military contractors with training in evading capture, survival skills, and the military code of conduct.”

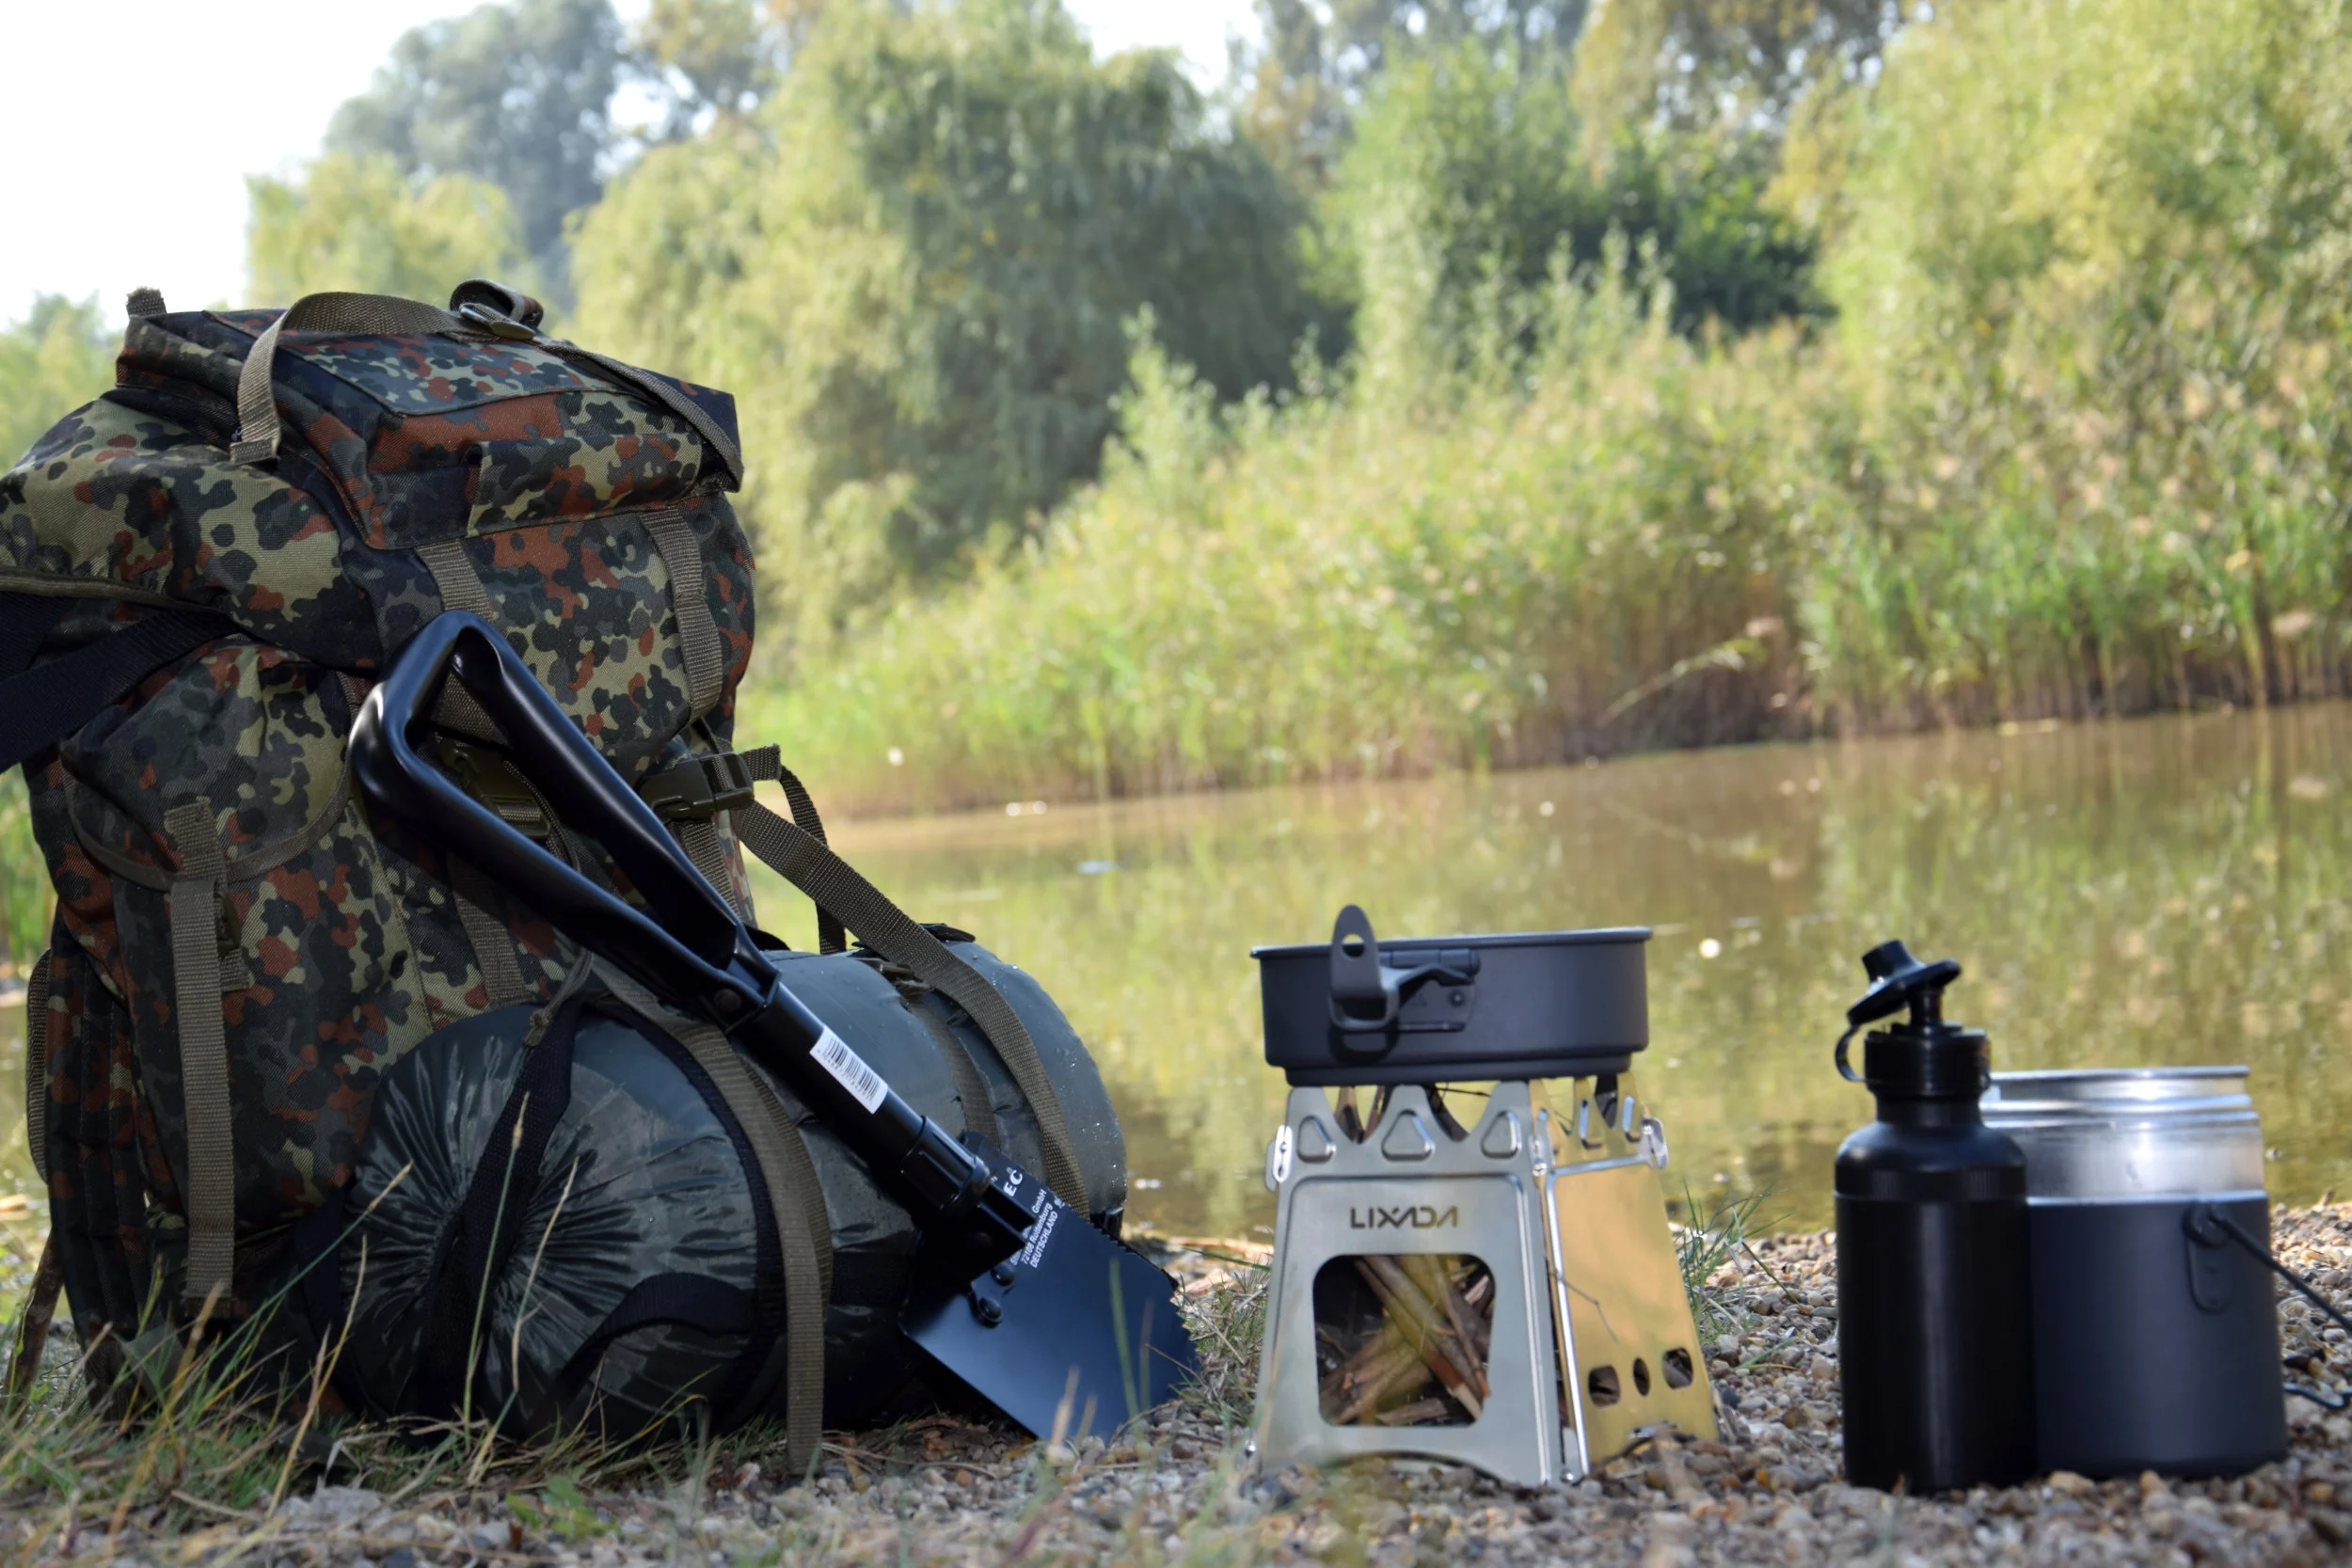
It is important to note that as an instructor in SERE, you can help train Airmen that are at risk for being shot down behind enemy lines. You are also in charge of helping to train the elite soldiers of the U.S. Special Forces. In order to keep all of our fighting men and women safe, these instructors are entrusted and trained to help guide them through the process of becoming self-reliant in any situation and in every environment. So, I would assume that it is safe to say that Jonathan is qualified and certified by the U.S. Military to advise on things within the realm of survival skills.Back to the book: The first half of his book is written like a research paper. This approach moves the conversation far away from another crazy Doomsday Prepper episode into an articulate and intelligent conversation. It’s true that his arguments are not all original and can be found splashed across the web on a multitude of prepping websites. However, I feel that he has done a better job of laying it out, and his approach is just more authentic, believable, and digestible for the general public. For anyone living with a non-believer, this book will go a long way to bridging the gap and motivating them to join in the preparations. If you buy this book even for the first half alone, you will be glad you did!The second half of this book outlines the basic idea of bugging out and the essential preps one needs to accomplish this mission—along with a proposed timeline of events after an EMP and tips for how you can use it to your advantage. In order to try and keep you on a budget, Hollerman takes you through the ideas behind a bug out bag and the gear you should carry. He itemizes in detail a few items that he feels are essential to your bug out setup and stresses the importance of keeping it light and minimal. He always gives the reader a few choices when it comes to gear, allowing for options for people on different budgets. It is important to point out that this gear is not cheap. Your gear should always be top quality to withstand a societal collapse. Let’s remember that Amazon and 5.11 tactical will be closed after an EMP, so the gear you are buying today is going to have to last you. For more in-depth coverage, you can also buy his Bug Out DVD. If you want to build a survival retreat, you can hire him for a one-of-a-kind design. I wish I had read this book at the start of my prepping carrier; I could have saved some money and a lot of space in my garage!One of my favorite characteristics about Hollerman’s writing is that, like a drill instructor, he is methodical and repetitive. As human beings we have a tendency to only hear what we want to hear. So to drive his lessons home, he brings up his points over and over again to ensure you walk away with the correct message. A few, but not all of his messages are as follows:

  1. Bug out or you will pay the price.
  2. The government and people smarter than him are telling you to prepare everyday.
  3. In a grid down situation, the government will not be able to save you.
  4. You are not John Rambo, so don’t be quick to get into the fight.
  5. You are not special, and in a grid down situation, you will be a target.
  6. The idea of being a lone wolf is flawed and only saved for a last resort option, so start build your team now.
  7. Preparing on a budget doesn’t mean it’s going to be cheap, it just needs to be done right. Buy once and buy right! Survival gear is like sushi—no one wants cheap sushi…it’s not worth the risk!
  8. Your food-supply knowledge as a prepper should be questioned and re-examined.
  9. You need to re-read number two & three in this list a few more times!
  10. One last time for those that are stubborn…YOU NEED TO BUG OUT!

As he illustrates his points, he notates all of his references to back up his opinions. The sources for his reference points are all found on his website in his research library. Logistically, this is very smart, because it allows him to maintain his reference links with up-to-date information related to the threat of an EMP attack on the United States. Many of his references are links to live C-span interviews of top-ranking officials backing up his theories. The messages these officials share are all consistent and they warn of the immediate threat our grid faces on a daily basis from possible terrorist attacks. For these officials, it is not a matter of if, but rather of when it will occur. Take a look at his website and derive your own opinions. I believe you will consider it to be time well invested!

Check Out Grid Down Consulting

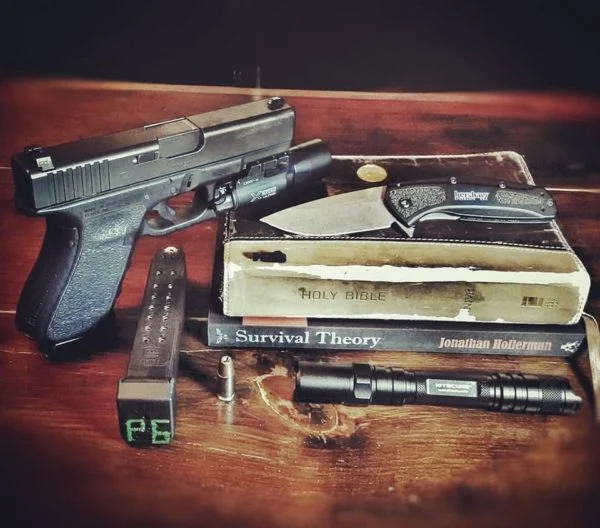
At the end of the day, all preppers are on a journey to find the training and guidance to survive and thrive in any situation. Hollerman offers his readers guidance from experience that helps one to prepare for the unknown. They may or may not speak to you directly, but his arguments are ones that are compelling enough that they cannot be ignored. I cannot speak for everyone, but I can tell you that I prepare because it makes sense. I prepare because it was the ways of our ancestors, and moreover, because history tells us to. The want to live is built deep into the structure of our DNA. Survival Theory is a book that will speak to this innate survival need, and it will motivate anyone that reads it to start preparing. Do yourself a favor and buy this book before you buy any more preps. It will not only inspire you, but it will save you time and money and help you better care for the ones you love. It is a true game changer for preppers.You can see how Hollerman practices what he preaches by following his Instagram account @griddownprepper.

Photo Credits: Grid Down Consulting @griddownprepper

Buy Survival Theory Today

SaveSaveSaveSaveSaveSaveSaveSaveSaveSaveSaveSaveSave

72 Hour Kits

72 Hour Kits

This is an amazing article from Ready Nutrition on 72 Hr kits or Bug out bags.  Please follow links to her site, she does an amazing job and is a leader in the art of Prepping.

 Are You Ready Series: 72 Hour Kits

Via Ready Nutrition

Many prepping websites have multiple articles on 72 hours bags (aka: evac packs, bug-out-bags, blow out bags or survival kits).  Every family should have a 72 hour kit ready, not because we should all run for the hills, but because there may be an unforeseen disaster such as a chemical spill or flash flooding where your family will have to make a swift evacuation.There are certain disasters that can occur with little or no warning such as fires, hurricanes and flooding. Having things in order as well as a plan in place will expedite the process of leaving, as well as keeping things running as smoothly as possible. The main goal of having a 72 hour bag is to be equipped to survive a three day period; and in this case, survival is dependent upon you. Therefore, the 72 hour bag should be pre-assembled and ready to go as well as have a 72 hour bag separately for the vehicle.Personally speaking, when I assembled my family’s bug out bags it took a few hours to run through the house getting all the supplies in order. If I was in a time sensitive situation, I would have forgotten half of the items I packed. It’s essential that your B.O.Bs (Bug Out Bags) are ready to go.

 What To Put Into a 72 Hour Kit?

The type of bag used for evacuation purposes is not important – some use duffle bags, backpacks and suitcases to store their gear in. Ensure the bag is sturdy and has the ability to hold gear and equipment. Many preppers have purchased their bags at military surplus stores due to the high grade fabric used. Another consideration is for the bag or container to be waterproof. For those with multiple people in their family, each person in the family should have their own 72 hour bag that is placed into a large plastic container. A bag or container with a carrying handle would be advisable if the container holds many items or is for a family. Some thoughts to keep in mind when preparing your 72 hour bag are:

  • Have a plan in place (choosing the location, let family members know where your destination is, the contact information, a secondary destination, etc.) Click here for a checklist on creating a family emergency plan.
  • Keep the basic needs in mind: food, water, shelter, clothing, safety and communication.
  • Try and find items that are light weight, functional and versatile so that carrying them in a container will not be a strain.
  • Take your bag out and use it a few times to test that nothing is forgotten.

Food – In a bug out situation, put thought into the situation you could find yourself in. You will be in a high stress environment where you may be on foot walking for long periods, or for that matter walking up and down hills. The foods we will carry will make all the difference in the world in terms of maintaining energy levels, and nutrition. Many preppers underestimate how much food they will need for their 72 hour bags. They believe that living off of survival bars for a main source of nutrition for 3 days will  give you the optimum nutrition. This just isn’t so.When you are preparing your bug out bag, you want your diet to give you ample calories, carbohydrates, protein, vitamins and some fats. Keep in mind that ages and genders will play a role in calorie consumption. As mentioned, you will be operating in a high stress and high energy environment, therefore your body needs to be running as efficiently as possible. With this in mind, you should plan to eat small meals every 2-3 hours. Click here for a list of adequate bug out meals.Have a means to prepare your food. A lightweight camping stove to cook food in, and purify water will increase your chances of survival. Try and find foods that are light weight an high in essential nutrition in order to increase your energy levels. Click here for more information on bug out meal planning. Have enough food for a 3 day period.  Some other possible food suggestions would be:

  • MRE’s
  • Crackers
  • Pasta
  • Hard candy
  • Energy bars
  • Dried fruits and nuts
  • Instant oatmeal
  • Granola bars
  • Powdered milk
  • Jerky

Some other suggestions for meals would be:

Water – Having a good water supply is more important than food. A person cannot go without 3 days of water so have a plentiful amount.  Disaster organizations stress for each person to have one gallon of water per day. In an emergency situation, it is also one of the first items to disappear off of a store shelf.  Having this stored in your 72 hour bag may be different. Therefore, many carry large water travel water bottles and then carry water purification tablets or a water filter to keep their load down. Here are some additional  ideas for carrying water:

      • Individual water bottles in the pack, gallon jugs of water, etc.
      • Canteen
      • Collapsible water container
      • Portable water filter
      • Water purification tablets
      • Life straws
      • Hydration powders

Clothing – Clothes in the 72 hour bag should be rotated every season and be appropriate to the environment you are in. As well, finding clothing that wicks moisture away would be helpful in both warm and cold climates. Having items in your bag that can be layered is a great option.

      •  If it is the winter season: Pack all cold weather essentials for maintaining body heat: Layered clothing, warm hat preferably with flaps over the ears, waterproof pants, mittens, etc.
      • Work gloves
      •  Have at least one change of clothing in your bag and two extra pairs of socks.
      •  A good pair of boots (hiking or combat boots) with a deep trench in the sole.
      • Rain suit
      • Poncho
      • Hat to keep the sun off your face.
      • Bandanna

Shelter – A shelter is to keep out the natural elements at bay as well as provide a warm place to sleep to maintain body temperature.

Fire – Having a means to producing fire will help maintain proper body temperature, assist in cooking food, and boiling water. If an emergency arises and you have to leave, you want to be able to have items on hand to make a fire to stay warm.

Communication – In a survival situation, communication is key. Family members and friends want to know that everyone is safe and sound and have made it to their ideal locations. Additionally, news sources such as radios need to be heard to find out if you are in a safe location, safe to go back to your home or are in a dangerous area.

Prepare in 26 Paychecks- A One year guide to being prepared

A Guide to Paycheck Prepping:

Have you ever wonder how to start prepping? I have established this paycheck prepping guideline to help make the daunting task of getting prepared more manageable for you. Most people get paid bi-monthly, which means you will receive 26 paychecks this year. I have broken down the basic steps of getting prepared over each paycheck to make the process more manageable for you.  Granted some folks make more than others, so please adjust your preps to what is comfortable for your budget.   There is no need to go broke over night in order to provide for your family in times of disaster, job loss, or whatever scenarios you have chosen to prepare for.  This is a process of learning, gathering, and becoming more self-reliant.  

Things To Consider When Using Our Paycheck Guide

  1. Decide what you are prepping for and this will help dictate your top priorities.

  2. Realize that you can't buy everything all at once so use our lists to help prioritize your needs.

  3. Identify special needs such as glasses, medications, or other personal items and make sure to prep those first.

  4. Start prepping your food and water supply right away! After all, if you are fed and hydrated it will buy you time to figure out the rest of your needs.

  5. Remember you can always come back and get stuff on the next paycheck.

  6. As you start prepping a lot of your needs will become clearer and your priorities will change so don't get hung up on one idea or item. The important thing is that you have decided to start prepping... so do it!

  7. Always be on the look out for deals and creative ways to prep while saving some cash.

  8. My lists are not the end all be all of lists. I have compiled these ideas from all over the web and from my experience. Check back often as I will always be adding more ideas, lists, and videos to each of the posts bellow.


Paycheck To Paycheck Prepping Breakdown

Pro Tip:

It is important to point out again that I repeat certain preps through out the year.  Each Prep list focuses on an area I believe to be important to you becoming more prepared.   However, I repeat products and already covered areas over and over again to ensure you build a strong survival foundation. The idea behind breaking up these preps lists is to allow you to gather a little  from each survival category along the way. 

For example, if you buy all of your medical preps today and a disaster happens tomorrow you will be bummed you didn't buy water and food supplies. Furthermore, you may exclude a few purchases along the way due to a budget issue on paycheck 5 but you may be able to afford those items by the time you get to paycheck 24.  As you prepare your focus will shift and you may find that you actually do need a N95 mask and  a  crowbar. My prep list's  are geared to constantly remind you of items so when the SHFT happens you have a well-rounded and thoughtful cache of supplies.Happy Prepping!

72- Hour Get Home Bag by Echo-Sigma

Echo-Sigma 72- Hour Get Home Bag

Echo-Sigma's 72 hour get Home bag is an extensive prepackage bug out bag.  This pack is loaded with goodies and is a great bag for your preps. Many preppers prefer to build their own Get Home bags in order to control the quality of gear in their packs.  In the past I have built my GHB (Get Home Bag) from scratch .  I have also purchased a few kits over the years, and this is one that I can recommend.  Your GHB is always changing and improving so the gear that is in it today can change tomorrow.  This kit by Echo-Sigma gives you quality gear that is packed and organized for you.  It is a great foundation for a beginning prepper or someone that wants an extra bag for their office or car.  My favorite part of this bag is it saves me a ton of time trying to track down & purchase all the gear.

The Price Is Right!

If you were to purchase all of the gear on your own you would need to consider the time it would take, the shipping and gas costs above the cost of the gear.  Many times you have to buy gear in larger packages so it actually increases the cost.  For example fire pucks come in a large box and are not sold in quantities of 2-3.  So in order to add those to your pack instead of $4-6 you would spend $25-35 for a box of 36 fire pucks! You could always add the extra pucks to your preps. I would use them them in multiple bags and use them on hunting or camping trips. If your on a budget it might make more sense to get only what you need and save a few bucks for other preps on your list.If you add up the value of the gear in this bag it actually comes out to the price of the pack!  The saving on shipping costs and tracking down gear is enough for me to be excited for this Get Home Bag.   All of your bags need to be personalized to fit your needs and environment.  It is impossible to think there could be a complete one stop shop or perfect kit out there.  You will always have to add gear as you learn what works best for you and your family.

The Pack

The pack is a great Condor brand bag and helps to keep the gear organized and accessible.   There's also room for you to add a few items to the bag.  Furthermore, if you buy the pack from their site you can customize the tools you get in the bag. You can add entrenching tools or upgrade the Gerber Multi tool for a few extra bucks. I highly recommend this upgrade as the tool that comes with it is more of a key chain style tool rather than a full multi tool.  Getting the tool you want for a few extra bucks is better than having to deal with one you won't be happy with.  You can also upgrade the food packages, lights, and add knives to your order as well.

Echo-Sigma Get Home Bag

    • Echo-Sigma Get Home Pack
    • Hydration System (2.5 Liter) by Echo-Sigma

      Echo-Sigma 1-3 Day Provision Pack

      • 6 Food Ration Bars (400 Calories each and nutritionally fortified)
      • 2.5 Liters of 5 Year Storage Pure Drinking Water
      • Paper Napkins
      • No storage requirements

      We use both AquaBlox and Mainstay brand drinking water products. Provision Pack contents may differ from those shown.

      Echo-Sigma 1 Day Provision Pack (Arid)

      Photo Source Echo-Sigma

      Echo-Sigma Compact Survival Kit

      • Compass
      • Emergency Whistle
      • Emergency Blanket by Coghlan's
      • BIC Brand Butane Disposable Lighter
      • Magnesium Fire Starter with Flint Striker
      • 40 Waterproof Matches by Coghlan's
      • Live Fire Sport Emergency Fire Starter
      • 50 Inches of Duct Tape
      • Bottle of Water Purification Tablets by Coghlan's
      • 2 Chemical Light Sticks by Coghlan's
      • 2 BIC Brand Ball Point Pens
      • Pad of Paper
      • Set of Earplugs
      Emergency Get-Home-Bag (GHB)

      Photo Source Echo-Sigma

      Echo-Sigma Compact First Aid Kit

      • 4" scissors
      • 3" tweezers
      • first aid card
      • 20 plastic bandages
      • 12 alcohol swabs
      • 10 wet wipes
      • 10 antiseptic swabs
      • 3 sting relief swabs
      • 4 pain relief tablets
      • 2 3"x3" sterile gauze pads
      • 2"x5yd. gauze roll
      • 5"x9" sterile abdominal dressing
      • 1 0.5"x2.5yd. roll of tape
      • Access to 14 exclusive online training videos
      Echo-Sigma Compact First Aid Kit

      Photo Source Echo-Sigma

    • SOG Reactor Multi-Tool
SOG Reactor Multi Tool

Photo Source Echo-Sigma

Waterproof LED Flashlight by Fenix (265 Lumen)

  • Cree XP-E LED with a lifespan of 50,000 hours
  • Digitally-regulated output to maintain constant brightness
  • Three Brightness Levels:
    • High - 187 Maximum Lumens - Run Time 2 hr. 20 min.
    • Mid - 90 Lumens - Run Time 6 hr. 15 min.
    • Low - 27 Lumens - Run Time 26 Hr.
  • Intelligent Memory Circuit: Automatically enters the previous used brightness level when turned on
  • Uses two 1.5V AA (Alkaline, Ni-MH, Lithium) batteries, inexpensive and widely available
  • Reverse polarity protection guards against improper battery installation
  • Made of durable aircraft-grade aluminum
  • Type III hard-anodized anti-abrasive finish
  • All-function switch; simple and convenient operation
  • Waterproof to IPX-8 Standard
  • Capable of standing up securely on a flat surface to serve as a candle
  • Slip-resistant body design provides for a comfortable and secure grip
  • Toughened ultra-clear glass lens with anti-reflective coating
Fenix E21 LED Flashlight                
  • 50 Feet of Military Grade 550 Paracord
  • 10 Extra Large Zip Ties
  • Coghlan's Emergency Tube Tent
  • Emergency Poncho
  • Plexiglass Mirror for signaling help
  • Thermal Sleeping Bag Cocoon by Survival Industries
  • 6 Premium AA Alkaline Batteries (guaranteed fresh for 7 years)
  • Pair Leather Work Gloves
  • 2 N95 Rated Respirator Masks
  • Pair of Protective Goggles
  • 2 Hand Warmers by Coghlan's

Photo Source Echo-SigmaEcho-Sigma-Get-Home-Bag-0