pantrycans-1024x680.jpeg

START SMALL START NOW

Pro Tip: Add a few extra cans on every visit to the store & build your pantry

The Prepping Basics


Always stick to the basics for the first few months of your preparedness journey. Set a goal of two weeks of supplies and grow from there. Try to buy preps that can be used for multiple applications so you get your monies worth. By buying small survival gear in the beginning you are really also buying preps for building out your Bug Out Bag, your Get Home Bag, and for your EDC (Every Day Carry). You don’t need to buy a Berkey home filter for $300 right out of the gate when you can buy a small filter for $15 for your water needs. Star small you are not wasting money you are building a foundation!!! First things first, you need to buy or source preps that can help to take care of the following needs:

Basic Preps

  1. Water

  2. Fire

  3. Shelter

  4. Food

  5. Security

    I recommend that you work in this order when obtaining your preps. I have to admit that by putting food as the fourth prep I am going against the grain of conventional preparedness wisdom. However, it makes practical sense to me to have food as my fourth prep and there are a few reasons why

Reasons To Prioritize Water, Fire & Shelter

  1. You can last up to three weeks without food and only three days without water.

  2. Fire allows you to boil water so you can drink it…food just uses up your water supply

  3. Without fire and shelter you are exposed to the elements and you could die from exposure via hypothermia

Water

Water is a daunting prep if you start off trying to save 200 gallons of water so don’t do that!! You need to focus on having a few gallons of water in the pantry to hold you and your family over for a few days (Just to start). It is recommended to have a gallon per day per family member. You can do this quickly by going to Costco or buying water storage containers. The containers take a little more thought and can add up fast($$$) so start simple and build a water plan for larger water storage in the future. A cheap way to be able to store 100 gallons is to buy a Water Bob for your bathtub!

You then need to buy a few ways to clean and filter water incase you loose your supply or have to bug out. All of my preps i buy are used for both bugging in and bugging out so my money spent has a few uses. For example, I recommend a Sawyer mini filter, purification tablets, and a mini stove and cook set to purify water. All of these items can be put in a go bag and can be used on the go just as much as they can be used to filter my water supply in my garage or bathtub. ( Yep I have Water Bobs for my bath tubs and you should too).

Fire

Ok lets not burn down the neighborhood but you need to have a few different ways to make fire. I would recommend going with easy methods before trying to become a bushcraft jedi. Don’t get me wrong fire making skills are crucial but for now let’s just have the ability to get a fire going quickly. For this I recommend buying bic lighters, a few boxes of strike any where matches, wind proof matches, and a few fuel sources. There are some amazing fire starters on the market that are cheap, light weight and almost 100% guaranteed to light every time. My two favorite are InstaFire and UST Fuel Cubes These two products alone are cheap and will catch a spark anywhere even in water! Also don’t forget to add a few candles yo your preps as they provide light when there are none and they can burn for long periods of time turning one match into a source of fire for hours. You can buy 115 hour emergency candles or go to the dollar store and buy their religious candles that burn for a day or two.

Shelter

No you do not have to build a bunker or buy a cabin to answer your shelter preps! Again you need to obtain a few ways to stay warm and dry and build upon that foundation. This can include buying a few wool blankets, a poncho, and a bivy sack. Getting your hands on a few Mylar emergency blankets will go a long way this is a great example of a small prep with many applications. They can be put into everyone of you go bags, your emergency medical kit, and your car. They work not only to keep you warm and dry but they can also be used as a signal or to catch water when it rains. After you get a few of these basics I also recommend adding to your cold weather clothing, getting a sleeping bag for everyone and then to start working on your tent situation. Even if you decide to bug in a tent can come in handy if your house is damaged or if your extended family of non-preppers happens to show up at your house! In a perfect world you would have a few tents one for a bug in situation one stashed at your final Bug Out location. But this is a big rabbit hole and requires a lot of thought and planning which we will get to in another phase of prepping…I digress.
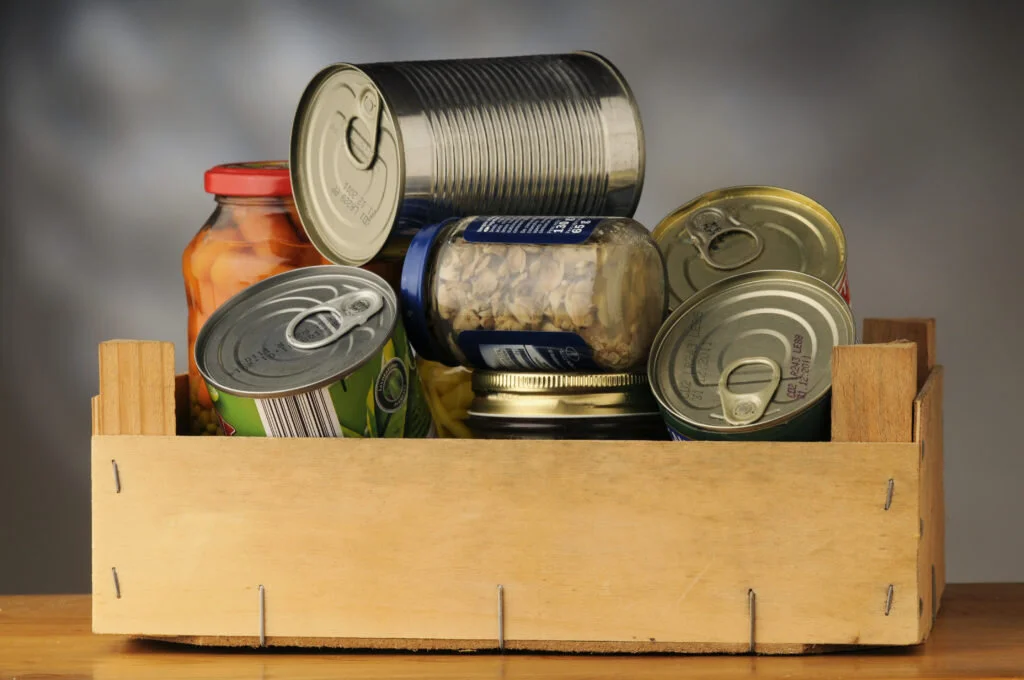
Food

Food is very important don’t get me wrong but I feel you need to address the above situations before trying to stock up a year of long-term food supply. When you start to address your food concerns build your pantry first as this is food you will use everyday at home and will help you win over family members that are not on board 100%. Especially if money is tight your significant other might not be happy with a months supply of freeze dried chili mac and may see it as a waste of money. They will however, appreciate it when you run out of salt, oil, or rice and you have a back up on hand in your pantry. This helps to cement the idea to non-belivers that prepping is practical and not crazy!

Security:

Once you have gathered a few items you should think about security and again here you should start small. You do not need 5,000 rounds of ammo by tomorrow but you do need to think about how you will protect yourself, your family, and your preps. This can be done by taking self-defense classes, buying pepper spray, hardening the security around your home, and changing your general mid set. I really enjoyed Jim Cobb’s Book Prepper’s Home Defense it was a great introduction on how to change how you view home security through the eyes of a prepper. This builds a good foundation for you to develop your own home or bug out location defense plan.

Again you need to continue working on your plan and developing goals so you can stay focused and prevent impulse buying through out your journey. So let’s help you develop a a basic emergency plan!


 Building A Basic Emergency Plan


This emergency plan should be created for possible emergencies first, not for your end of the world plan. This plan is the foundation for how your family will respond in the case of a house fire, earthquake, mandatory evacuation, or any situation you may need to prepare for in your area. Your emergency plan is a plan that will ensure everyone can find each other, stay in contact, and react thoughtfully to an otherwise stress full situation. This plan has to be shared with every family member (including children to the degree they can understand), you should practice your plan, and you should continuously review and adjust your plan as you become more prepared. I would suggest reviewing it every few months.

First Steps To Creating your Emergency plan

  1. How will I receive emergency alerts and warnings so I can be proactive

  2.  Where are we planning to find shelter? Is it at home, Grand ma's house, a friend's house?

  3. How are we going to get there? What Are my evacuation routes?

  4. How are we going to communicate with each other?

What Are My Family's Specific Needs?

  • Identify the needs of different members of your family, such as children and the elderly. These needs can affect your ability to be mobile or where you can go to for shelter. 

  • Dietary needs: This is great to think about and will affect the foods you buy

  • Medical needs, including prescriptions and equipment: What meds do you need for allergies or chronic illness? It would be best if you talked to your doctor about increasing your on-hand supply. Do you need equipment to stay alive? Do you have spare parts or a power plan for keeping those items running?

  • Pets or service animals

  • Do you have proper transportation?

  • What locations do your family members frequent the most? Identifying these locations is essential as you will need to develop plans to get to family members to get them to your met up sites. For example, do your kids go to different schools? Who is responsible for obtaining them? If a road is closed down, what's your alternate route to your met up location?

Action Items

  • Points Of Contact: Out of town point of contact and an In town Point Of Contact

  • Establish a meeting place in your neighborhood: If there's a fire We will meet at XYZ neighbors house

  • Establish an out of town meeting place

  • Write out a list of important contacts and make sure that each member of the family has the same list

  • Essential Documents: Include essential papers (birth certificates, marriage license, insurance information, house deeds, life insurance, car insurance) and vital medical information (allergies, blood types, medical prescriptions needed) on family members and pets, including doctors phone numbers and veterinary phone numbers and addresses

  • Maps: Make sure each adult has a local map with multiple routes to your meeting places highlighted for ease of reading. I have one in my car, and my Get home bag. These maps are cheap and lightweight. 

  • Create a Prep List of Items you will need to pull off an evacuation if needed:

    • Establish Go Bags and or duffle bags for the kids' gear that can be thrown in your car quickly

    • Create little go bags for your kids: For the young ones, this bag is not for survival gear but rather a few items that will help them calm down. A game, a stuffed animal, warm pajamas, a change of clothes, crayons, a treat or two, a flashlight, and a few glow sticks. The older ones you can add more to the bag depending on what they can carry

    • The Duffel Bag or EVAC Bag: Not every family member can carry their weight, so I have an EVAC bag that has season-appropriate clothes for them, lightweight long-term food products, a few kid-friendly snacks, back up hands-free flashlight, batteries, and general hygiene items ( toothpaste, brushes, baby wipes, soap, necessary meds)

    • Small first aid kit

    • Water packed in your car: I keep a few liters and full water bottles in every door at all times

    • 72 Hours of food per family member

    • Sturdy working shoes

    • Emergency shelter or at least, mylar emergency blankets, bivvy sacs, etc

    • Essential survival tools packed and ready to go: I keep these either in my car or in a tub or bag by the back door. This bag would include any tools that are not already in my go-bag. Remember you have to fit your family in your car as well! 

    • Set up your go bags and ensure that your basic needs are satisfied in those bags. Your car may break down, or the roads could be damaged, and you may need to go on foot. That means you have to be able to survive living out of your go-bag alone!

Here are a few links from FEMA to help you further organize your plan

Empty_supermarket_shelves_before_Hurricane_Sandy_Montgomery_NY-768x594.jpg

Build Your Food Preps

There is nothing worse than being hungry, except maybe being starving. Food preparation is so vital for anyone starting down the road to becoming prepared. Urban Peppers need to focus on this as we are in an urban area where food sources can become scarce quickly during an emergency. Most major grocery chains only keep on hand a three day supply of food; this means if everyone in your neighborhood rushed to the store for supplies, you might find all the shelves empty the very first day. What happens if roads are flooded, or are not accessible due to ice storms or fires? Your local market could very well look like this:

Don't worry; you don't need to move to a larger house, develop a fully functional homestead, or get two years of food and hide it under your home to start prepping. But as a responsible person, you should do something. The government and FEMA suggest having a minimum of 72 hours of food and water for the entire family to be safe in an emergency. This need has given birth to the 72 hr bag,  which you can read about under bug out bags.  We suggest you start by developing a 72 hr kit and then move on after you figure out what exactly you are preparing for? Take New Orleans or the Philippines; for example, there were many areas stranded for weeks without proper water and food supply. If you are preparing to bug in at your house, you will want more supplies than if you were planning your bug out bag. I started at 72 hours, and I have grown from there, adding supplies at my house, in my car, and at my bug out location.

Prepping is a process and only requires you to start preparing for the unforeseeable future. Look at it as food insurance, when you need it, and it will be great to have. Besides, I have to admit it is excellent just having an everyday pantry that I use as my personal home store. I started by buying 2-3 extra items per visit to the store; this allows me to lock in that day's price on that item and prevents me from having to go to the store over missing pasta sauce or rice to complete a meal (save your gas money).

Your Home Is Your Castle...Prepare It For Survival


If you are starting to prep, then you have heard a ton about "Bugging Out" and maybe only a little about "Bugging In". You can never be too prepared, and having options is essential in case you can't make it to your bug out location. I believe there are a ton of scenarios where you could have the choice to stay home, and if that option is on the table who wouldn't want to ride out a disaster in the comforts of their own home? We all have a house or an apartment of some kind, and it's our job to get our homes ready for a possible "Bug In" situation. With some basic steps and a few paychecks, you should be able to: 

  • Build up a three-month food supply

  • Develop a mini Urban Farm

  • Stockpile 3 months of water

  • Add extra security measures to your home

  • Build up a medical supply

  • Acquire off the grid tools that can help perform daily functions

  • Develop a security plan

Remember, stores only carry a three-day supply of food, and have been cleared out in disaster situations within 3 hours by the non-prepared masses. So let's start prepping today so we can sit back in the comforts of our home and let the others slug it out in the checkout lines! 


 How to Build The Best EDC Bag


An EDC (everyday carry) is precisely that, a bag you carry with you wherever you go daily. The bag shown here is by Maxpedition and comes in a ton of colors, including tactical black or Army green. I would choose a color that would blend in more in an everyday urban environment. This way I can go about my day without drawing attention to the fact that I am carrying around survival gear. Your bag should hold and organize your equipment but still be small enough to keep on you throughout your daily routine. This bag is not your ultimate survival bag, but it should be sufficient enough to get you through until you get to your "Get Home Bag" or "Bug out Bag." 

Suggested EDC Contents:

Meet the Maxpedition Fatty Pocket Organizer.  This organizer is a great item to have in your EDC, Bug Out Bag, or your Get Home Bag to help organize your vital tools and essential equipment. I have one in each of my bags, so no matter what happens, I have multiples of every crucial tool. For example, let's say you leave your bag in your office, and something happens, and you have to head home without returning to your office, it would be nice to know that you have the same gear stored in your get home bag in your car. Build one and see where you want to go from there. If you're on a budget, you can buy just one of these as they are small enough for you to transfer it from bag to bag. If you can purchase multiple pocket organizers, I recommend that you change or tweak each one slightly due to the bag it's going in. For example, in my EDC and Get Home bag, I might put some tools in there that are better suited for Urban environments. Some of these items would be: bump keys, a mini crow bar or a mini hack saw to cut metals, etc. Whereas, my bug out bag, might be more heavily geared towards remote survival needs and more long-term functionality in the outdoors. Again all of these tools and needs are driven by two things:

1. What are you preparing for, and why?

2. The environment you live in daily. 


Suggested Contents For your Maxpedition Organizer:

Suggested Contents for Your EDC Bag- For The Office

  • NoteBook

  • CRKT Space Pen or Uzi Tactical pen

  • Flash drive aka pen drive or stick

  • Your medication/ general meds/allergy meds

  • Small, basic first aid kit: Band aid's, Neosporin, Antiseptic wipes

  • Cell Phone/charger: maybe a solar charger

  • Wallet with Id, bank card, cash

  • Gum, or jolly ranchers ( A good sugar rush or spirit lifter)

  • Ipad

  • Energy bars

  • Lunch /water bottle

  • Dried Juice Mix- Gatorade or MRE Juice packs

  • Gun and two extra magazines for protection. ** NOTE: This assumes legal concealed carry compliance**

  • Pepper Spray

  • Maxpedition Fatty Organizer or Mini Organizer

  • Gloves

  • local street map and state map

What is a Bug Out Bag?


A "Bug Out Bag" or a "BOB", is a bag that you have ready at all times in case you need to leave your home due to an emergency.  This bag is meant to hold 72 hours of food, clothing, and basic survival gear to help you stay alive while you relocate to a safe area.  These bags are as simple or as complicated as you wish them to be.  Many items depend on your personal needs, geography, and possible disaster scenarios.  For example if you live in a land locked area an emergency flotation device might not be one of your top priority items. Here we are laying out our Bug out bag from the essential items everyone should carry, to extra gadgets and tools that can help one to survive in an urban and rural environment.It is important to remember that you have to carry this bag and be able to move fast with it, so pack wisely!  If you get a knock at the door at 3 am and are asked to evacuate, you should be able to grab this bag and go.  You should also consider your evacuation route, creating an additional evacuation bag, and your Opsec (operational security) needs.

Evacuation Route:

It is important to know where you need to go in an emergency situation and multiple ways to get there in case of road blocks or accidents.  We will cover this in further detail in a future blog post.

"Evac" Bag:

The additional "Evac" bag is a bonus bag, and allows you to pack extra equipment, clothing, and food if you are fortunate enough to be leaving by car.  These bags are larger and may be more burdensome to carry if you have to leave your car behind and continue on foot. This bag can be built over time after you have finished your Bug Out Bag.

OPSEC: "Operational Security"

This is important into your planning while prepping.  For example, if you live in the heart of a city, walking down the street in all camo, with shotguns attached to your tactical bag might draw unwanted attention. If people are starting to scramble you may stick out as a person carrying much needed tools, supplies, and food to those that are unprepared.  In this case you may want an everyday looking bag so you appear as a student or a tourist walking in an urban area.  The small backpack shown here would be great as a Get Home Bag or a large EDC bag.  You can carry this in your car, put it under your desk, or walk down the street with it and no one would assume it is full of survival gear.Here an  a few examples of backpacking bags that would allow you to blend in as a tourist in an urban environment.  These bags are larger than the backpack shown above and would be better suited for an "EVAC" or "INCH" bag or for your long-term survival needs. 

How To Build A Bug Out Bag


Water:

You can not survive with out water, so this is priority number one!  Water is bulky and heavy so you can not possible carry all the water you will need. After you fill a few water bottles and maybe a hydration pack you need to think about what happens when you run out? Here are a few Options:You can always carry a few pouches of emergency water with you, I would recommend buying a box of pouched emergency water so you can split the pouches up over your Get Home Bag, Automobile Emergency Kit, Bug Out Bag, and for your home supply.This is a great start but you will need to make sure you have the ability to capture and purify water along the way.  For that process we recommend water purification tablets as they are small and light weight. You need to read the instructions to make sure you use them correctly, but they will allow you to purify water in any container you may have from a plastic bag to an old soda bottle.  These tablets will only last for so long, and they can be ruined if exposed to water so you will need to have a back up. We recommend the "Lifestraw", it is light weight and allows you to drink on the go.  If you can find a puddle you can find a water source.  there are many straws on the market and some are designed to purify to higher levels, to rid water of certain chemicals, and much more.  This is the old faithful and is great for most bug out  and survival situations. 

Shelter & Fire

There is nothing worse than being cold, wet, and tired in a survival situation so fire is essential to your bug out bag.  Fire can lift ones spirits, dry off your clothes, signal for help, purify water, help to make tools, and can help you cook your food.  Here are a few fire starting tools for you to You need to stay dry and warm as hypothermia will kill you in a heart beat!  So make sure you have the bare minimal tools to create a shelter to help protect you from the elements.  A small layer between you and the ground can be a life saver so make sure you have some options.  I carry the Sol Emergency bivvy shown here and the reflective tent.  The bivvy sac will protect me from loosing body heat, and the tent can help protect me from rain, wind, and the cold. The tent is also made out of materials that I can use as a tarp, an additional blanket, or to draw attention to my location from the air if I am looking to get rescued.

Food

72 hour kits are a great source for your bug out bag, but they do have limitations that you should be aware of.  They require water to make them, which if its in short supply could be a big issue.  Here are two 72 hour Kits by Mountain House and Wise Food Company.  These are fast and easy to make and have a good flavor profile, ask any back packer they do the trick. I recommend MRE's for a bug out bag, because they are simple and filling just open the pouch and you have a meal.  There are a lot of imitation or "civilian" brands out there, so shoppers be ware.  I recommend the military warrior MRE's that are higher in calories and come with warmer kits that automatically warms the food for you.  Calories are crucial in a high stress and highly physical environments.  MRE's are great and can be found on EBAY all the time for $40- $120 depending on how lucky you are and shipping costs.  Spend some time watching how much people charge in shipping, they may sell the MRE's at a low price and make up for it on the back end.   I would say $85 is the average price for a case of MRE's shipping can be $15-20.  It is important to note that MRE's are high in calories but are not meant to fulfill your long term survival needs, as you will eventually need to add more nutrition to your diet.  But MRE's will keep you full and moving for a long time and are perfect for bug out or bug in situations.  It is also important to think about the weight of your BOB, so maybe a mixture of MRE's and dehydrated foods is the way to go.I have MRE's and dehydrated food in my food supply at home.  I buy MRE's, Wise food, and Mountain House to add a bit of variety to my long-term storage, so my family wont experience food fatigue by eating the same thing day in and day out.  Variety is the spice of life!

Documents

Corsair Flash Survivor Stealth 32GB USB 3.0 (CMFSS3-32GB)

You need to back up your essential documents and carry them with you.  What if you loose everything in a storm?  It might be handy to have a thumb drive with back ups of your Insurance, deeds to your home, social security cards, Id's and much more.  See the attached list below, for suggested items to back up on a drive of your choice.  Security is important so do your research!!  I always believe in the rule of multiples when prepping, so I back mine up to a cloud service called dropbox , I keep photo copies in my safe, and in my safety deposit box, and I keep info on the drive shown here.  I keep this drive on me at all times. 

Suggested Bug Out Bag Equipment:

There are so many items and personal touches you can add to your bug out bags, the choices are up to you.  Be warned you have to carry these bags and survive so don't over do it!  Remember, all the tools in the world won't save you if you don't know how to use them or the basic rules of survival.  knowledge is key to your survival!To see a complete selection of bug our bag items check out our build your own bug out bag store! Click here